Autumn is the perfect time to slow down, enjoy the changes, and spend time with friends. For your next girls’ night, consider making it a Thanksgiving DIY night. With these three crafts, you’ll have the chance to relax, get creative, and share time with the ones who truly get you.
CUSTOM TOTE BAGS
Materials
- Plain canvas tote bags
- Fabric paint or acrylic paint
- Paintbrushes
- Fabric markers or paint pens
- Stencils (letters, shapes, or fun designs)
- Pencil for sketching designs
- Cardboard to place inside the tote (prevents bleed-through)
- Tape
- Optional embellishments: rhinestones, sequins, iron-on patches, glitter glue
- Iron (if needed)
Directions
1. Prep your tote bag by inserting cardboard inside the tote to prevent paint from soaking through to the other side.
2. Use a pencil to lightly sketch your design on the tote. Think names, quotes, floral designs, or geometric patterns. Decide where you might want stencils or freehand painting.
3. Place stencils where you want shapes or letters, and secure lightly with tape.
4. Use fabric paint for best results. Apply in thin layers to prevent cracking. Use paintbrushes for larger areas and paint pens or markers for details.
5. Add optional embellishments like sequins, glitter glue, or iron-on patches.
6. Allow the paint to dry completely. Depending on the paint, this may take 1–4 hours. Remove any tape or stencils carefully after drying.
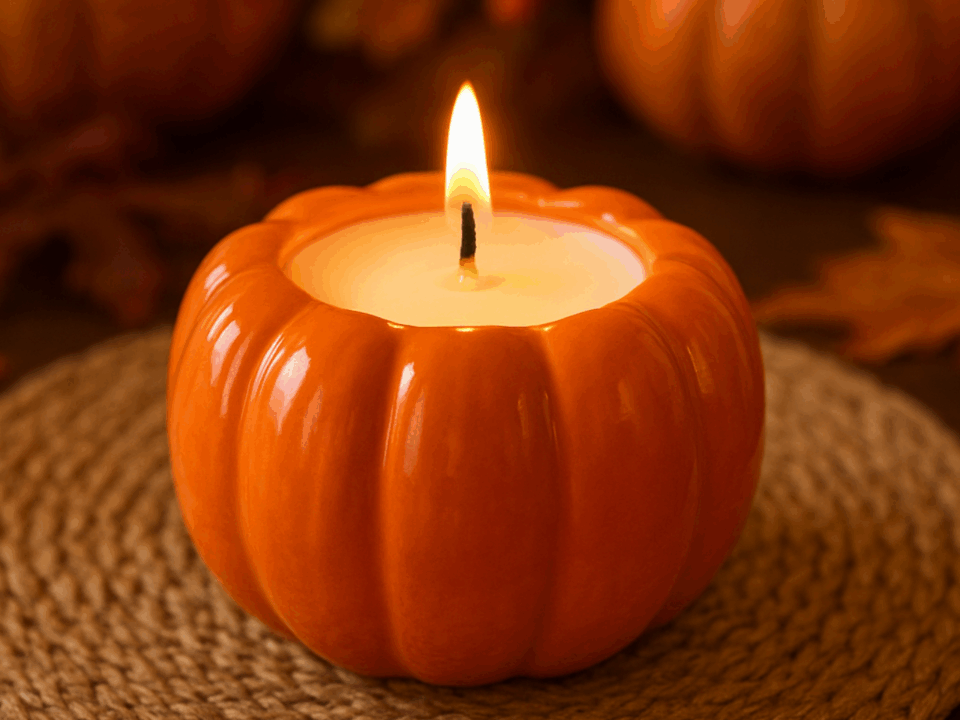
FALL PUMPKIN CANDLES
Materials
- Small ceramic pumpkin containers
- Candle wax (soy or beeswax recommended)
- Candle wicks
- Microwave-safe bowl for melting wax
- Fall-scented fragrance oils (pumpkin spice, cinnamon, apple, clove, etc.)
- Wooden skewers or chopsticks (to hold wicks in place)
- Thermometer
- Stirring spoon or popsicle stick
- Hot glue
Directions
1. Lay down newspaper or a craft mat to catch any spills. Make sure your ceramic pumpkin is clean and dry. If needed, attach the wick to the bottom center of the pumpkin with a dab of hot glue.
2. Using a microwave-safe bowl, melt your candle wax according to package instructions. If using a thermometer, aim for around 170–180°F (77–82°C) for most soy waxes.
3. Add 10–15 drops of fall-scented fragrance oil per 1 cup of wax. Mix thoroughly.
4. Carefully pour the melted wax into the ceramic pumpkin, holding the wick centered. Use a wooden skewer or chopstick across the top to keep the wick upright.
5. Allow the wax to cool and harden completely. This can take 1–2 hours. If the wax sinks around the wick as it cools, you can top it off with a little extra melted wax.
6. Once fully set, trim the wick to about ¼ inch above the wax surface.
7. Light your pumpkin candle and enjoy the cozy fall scents!
DOORMAT PAINTING
Materials
- Plain coir or natural fiber doormat
- Acrylic paint or outdoor paint suitable for coir mats
- Paintbrushes
- Stencils (letters, fall leaves, pumpkins, turkeys, etc.)
- Painter’s tape or masking tape
- Chalk for sketching designs
- Optional embellishments: fabric markers, glitter paint (for fun accents)
Directions
1. Decide on your Thanksgiving saying, such as: “Give Thanks,” “Grateful, Thankful, Blessed,” or “Harvest Greetings.” Sketch your design lightly with chalk.
2. Apply stencils or tape to create clean edges for letters and shapes. Tape off any sections where you don’t want paint.
3. Use acrylic or outdoor paint to fill in your letters and designs. Apply in thin layers, letting each layer dry slightly to prevent smudging.
4, Add optional accents like leaves, pumpkins, or autumn patterns around the saying.
5. Allow the paint to dry completely, usually 2–4 hours depending on paint thickness. Carefully remove any stencils or tape once the paint is set.
6. For extra durability, you can spray a clear outdoor sealant over the painted areas. This helps protect your artwork from weather and wear.
7. Place your personalized doormat at your front door or inside your home for a festive Thanksgiving touch.